 hello@simplestay.io


 English
 Dutch
Dutch
 Español
Start from the pricing warning
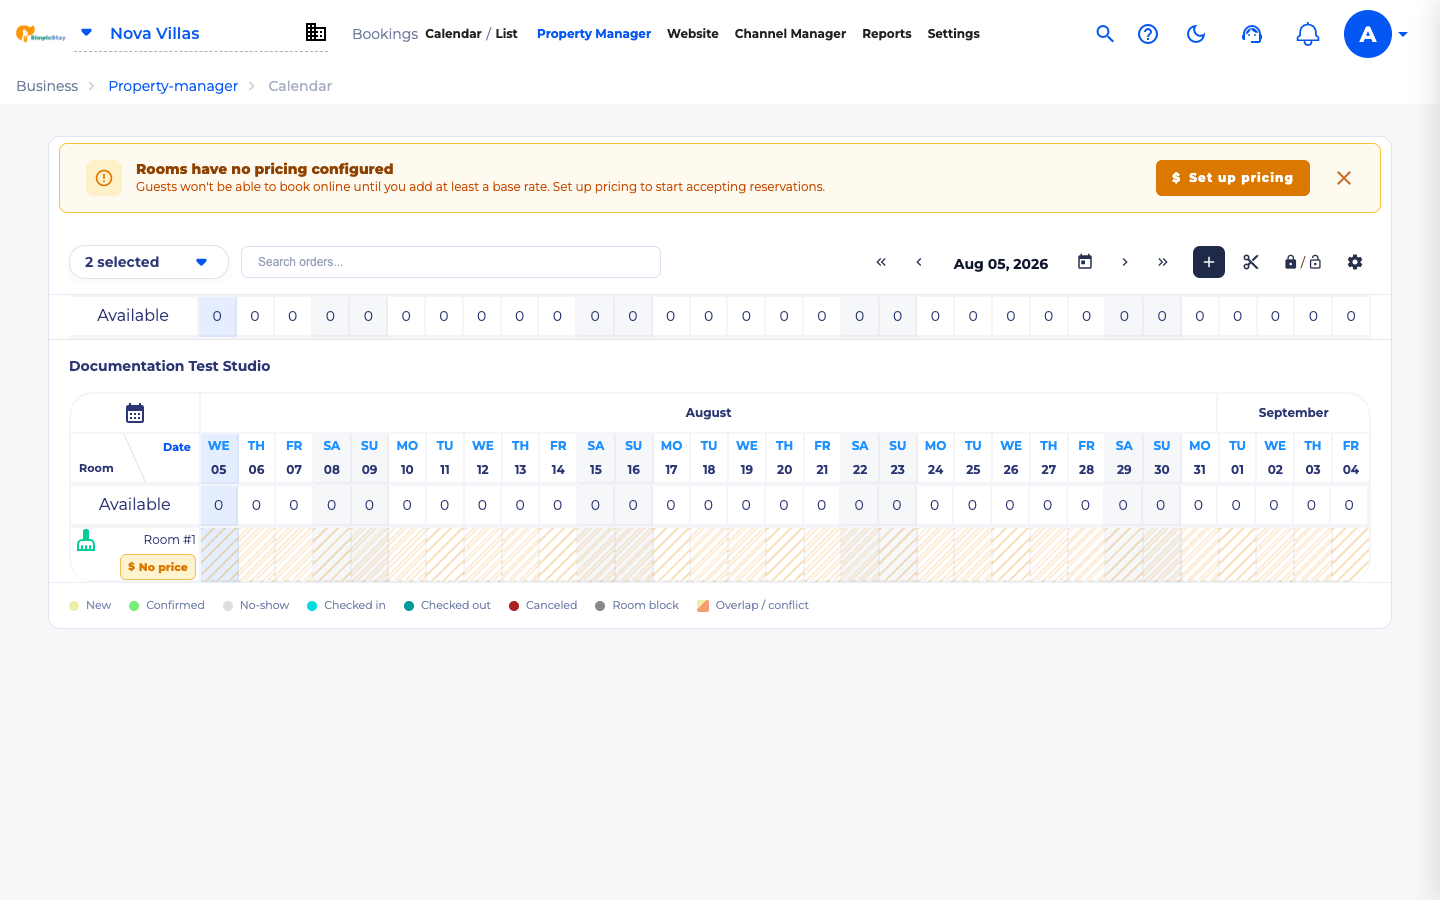
After creating your first room type, SimpleStay may show Rooms have no pricing configured on the calendar. That warning means guests cannot book online yet because the room has no base price.
Click Set up pricing to open the pricing area, or go to Settings, then Sales, then Availability.
Open the Base price grid
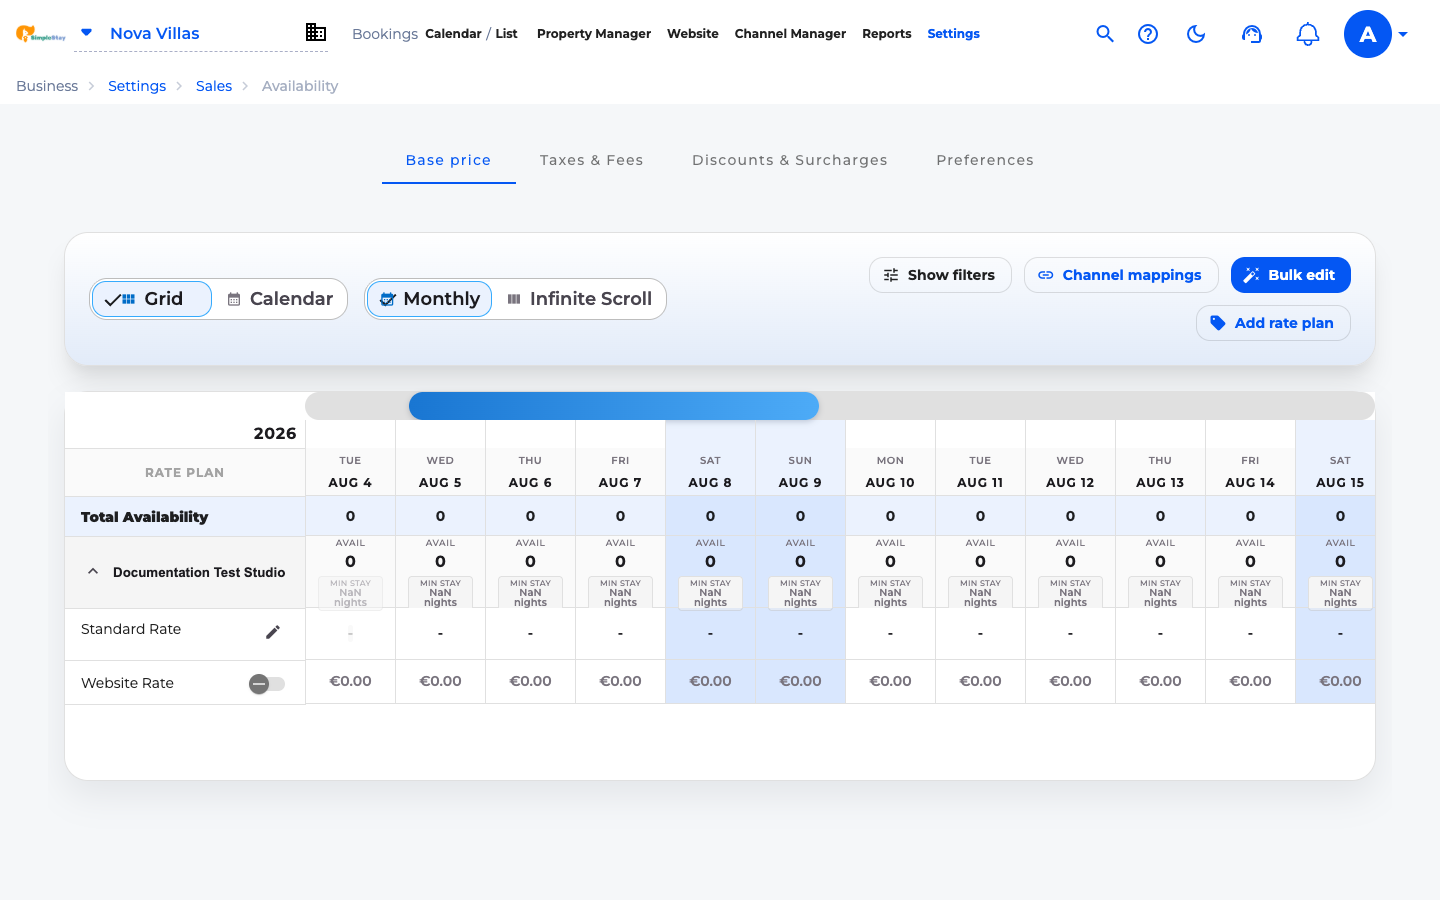
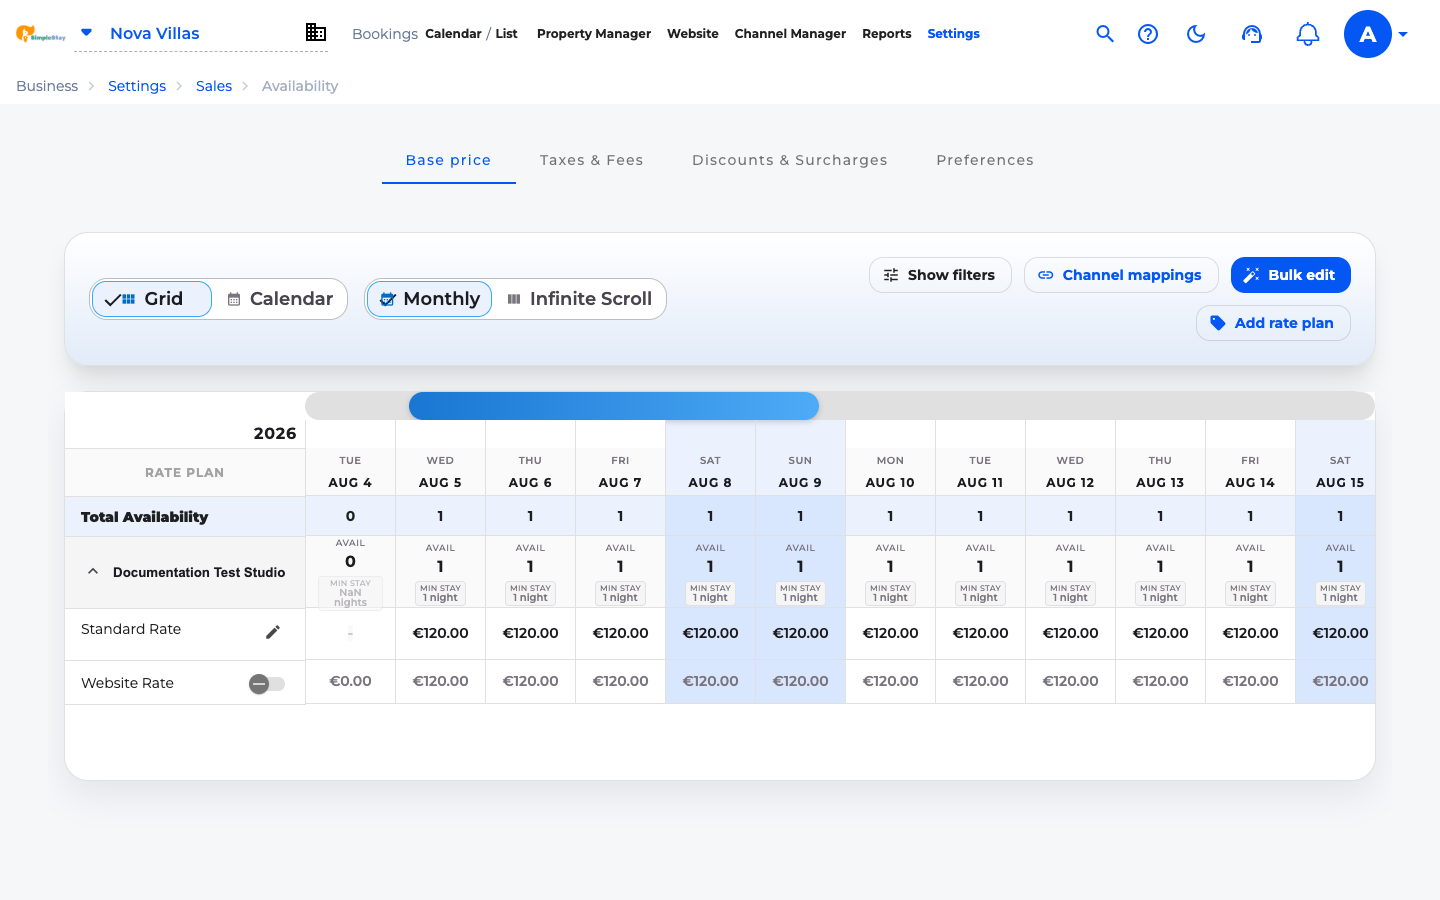
The Base price tab shows your room type, rate plan, dates, availability, minimum stay, and nightly price. For a first setup, stay in Grid view so you can see many days at once.
Click Bulk edit
Use Bulk edit when you want to set the same price across a full date range. This is faster and less error-prone than clicking each date cell one by one.

Select the room and date range
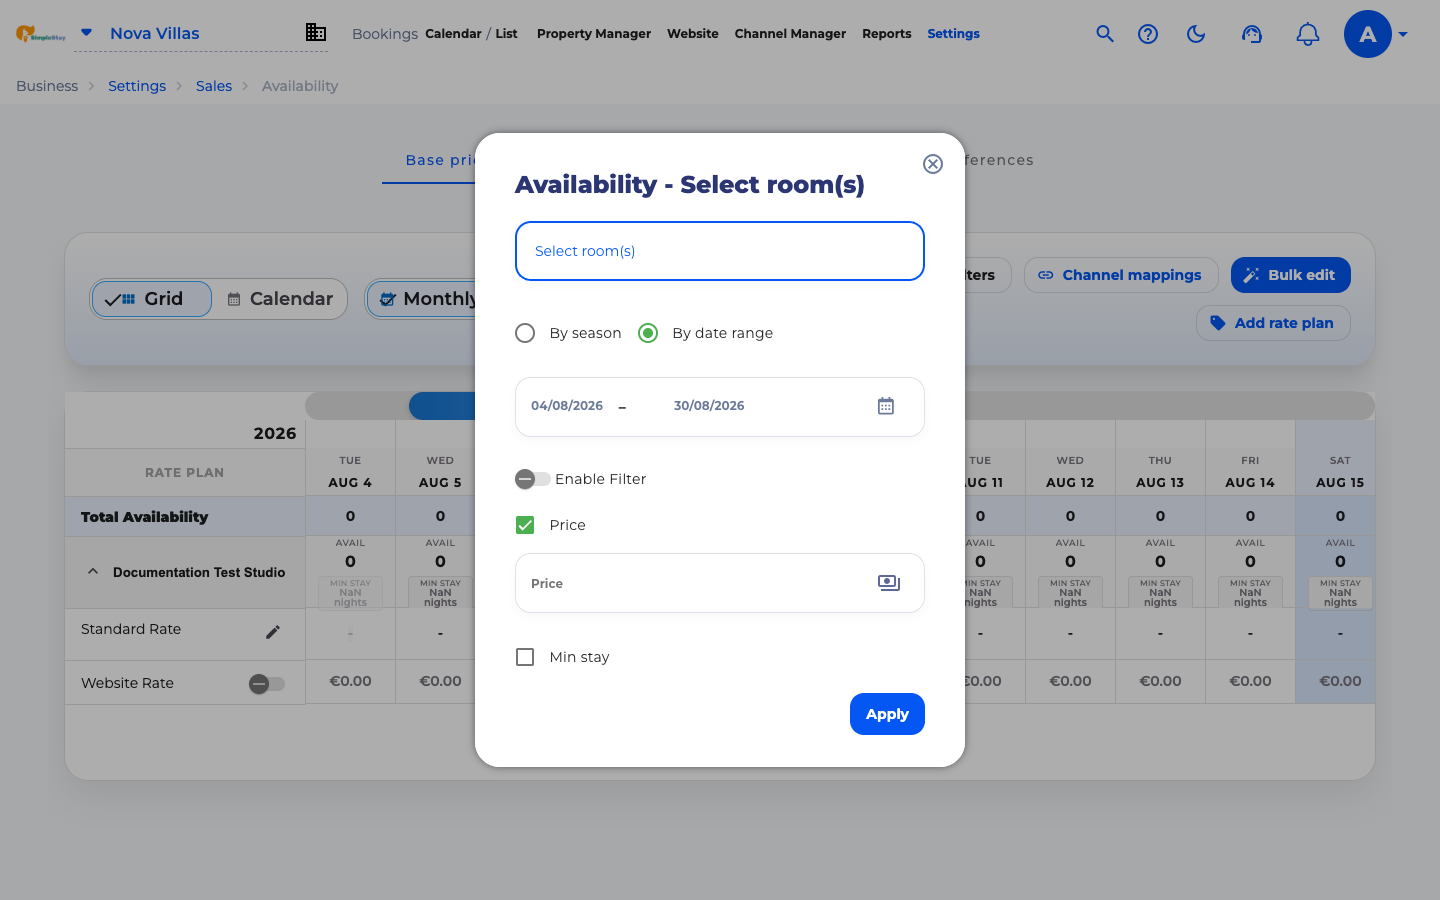
In the Bulk edit panel, choose the room type you want to update. Then select the dates that should receive the same price. In this example, the date range covers most of August 2026.
Enter the nightly base price
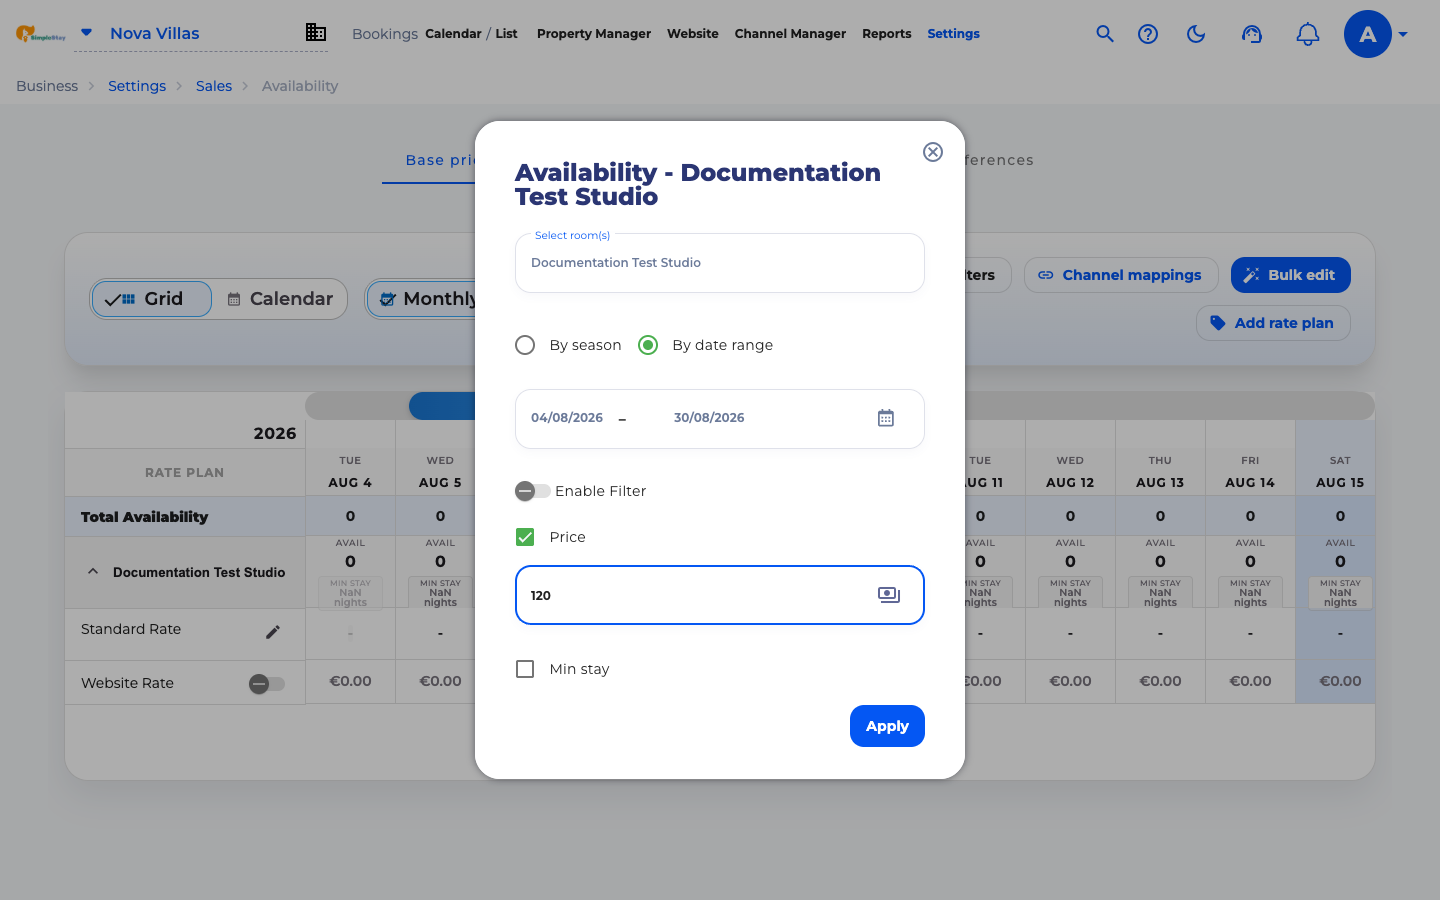
Leave Price enabled and enter the nightly amount. The example uses 120. SimpleStay will apply the value to the selected room and dates.
You can also enable Min stay from the same panel, but for the first pricing step it is fine to focus on the base price only.
Apply the update
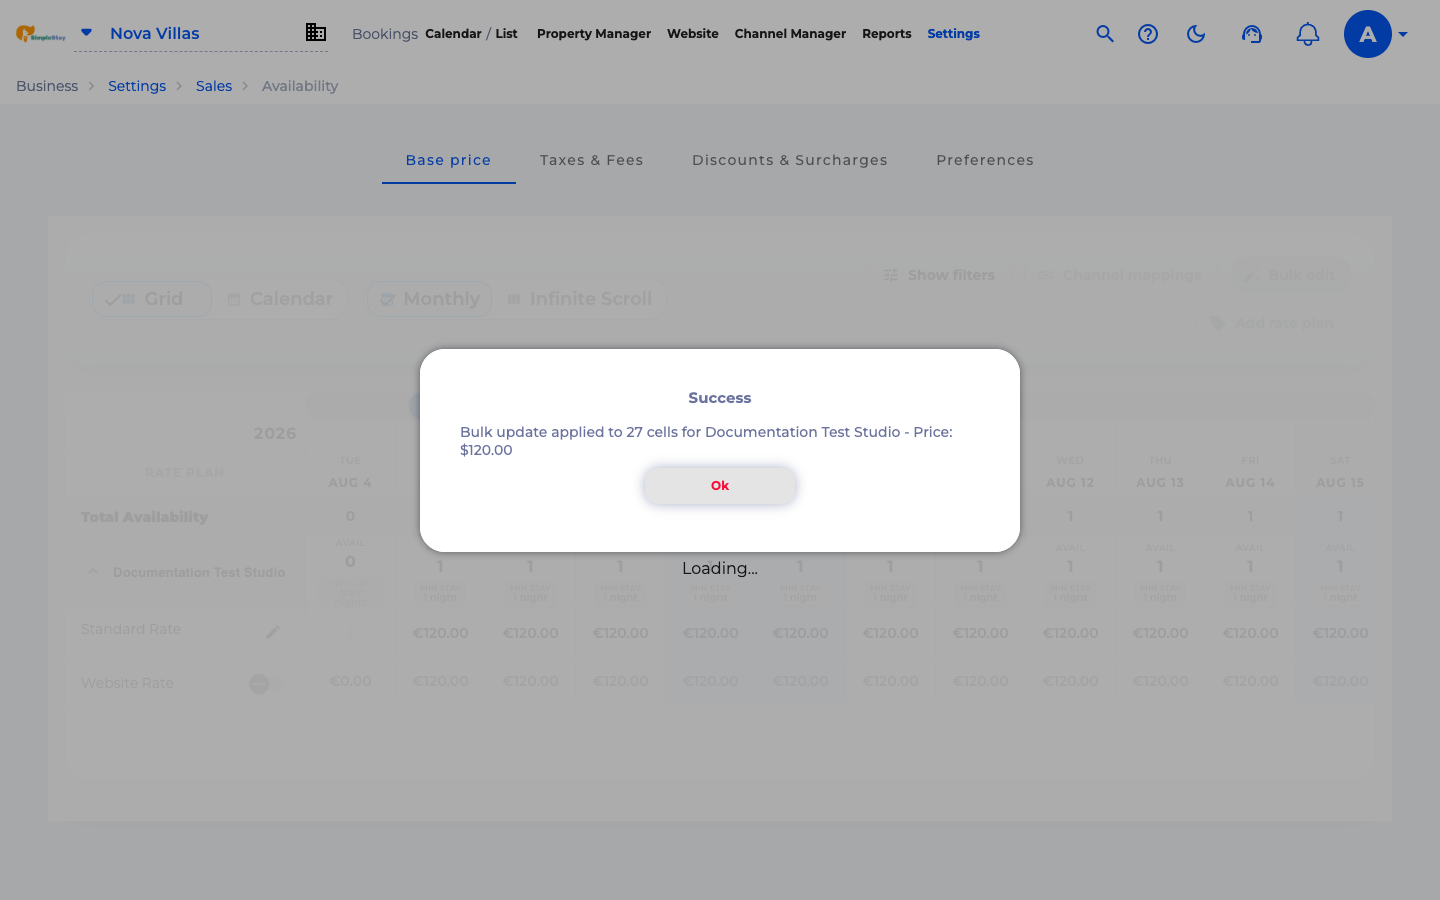
Click Apply. SimpleStay confirms how many cells were updated. This confirmation is useful because it tells you the change reached the selected room and date range.
Confirm the price appears in the grid
Close the confirmation and review the grid. The selected dates now show availability, a minimum stay, and the base price. Your room has moved from created inventory to priced inventory.
Frequently asked questions
Why does my room still show as not bookable after I create it?
A room usually needs at least one active price before guests can book it online. Add a base rate for the dates you want to sell.
Can I set prices for many days at once?
Yes. Use Bulk edit to select the room, rate plan, and date range, then apply one nightly base price across those dates.
Should I review the calendar after saving a base rate?
Yes. Confirm the price appears in the grid and check availability before sending guests to book.
What to do next